Data for your capstone project
Step 1: Identify data for your capstone project
Ideally, you or your organisation has a dataset that you can use for your capstone project. Note that we intend to publish the final capstone project reports as public websites and that the you chose can be shared publicly.
Data that is not suitable:
- household surveys with personal information about individuals
- household surveys with GPS coordinates
- sensitive data about individuals or organisations
Data that is suitable
- household surveys with aggregated data
- household surveys with no personal information about individuals and no GPS coordinates
- observational data
- laboratory data
- data from a public source
Your data format should be one of:
- CSV
- Excel
- JSON
If you do not have a dataset, you can use the following resources for inspriation:
Step 2: Create a new repository on GitHub & clone to Posit Cloud
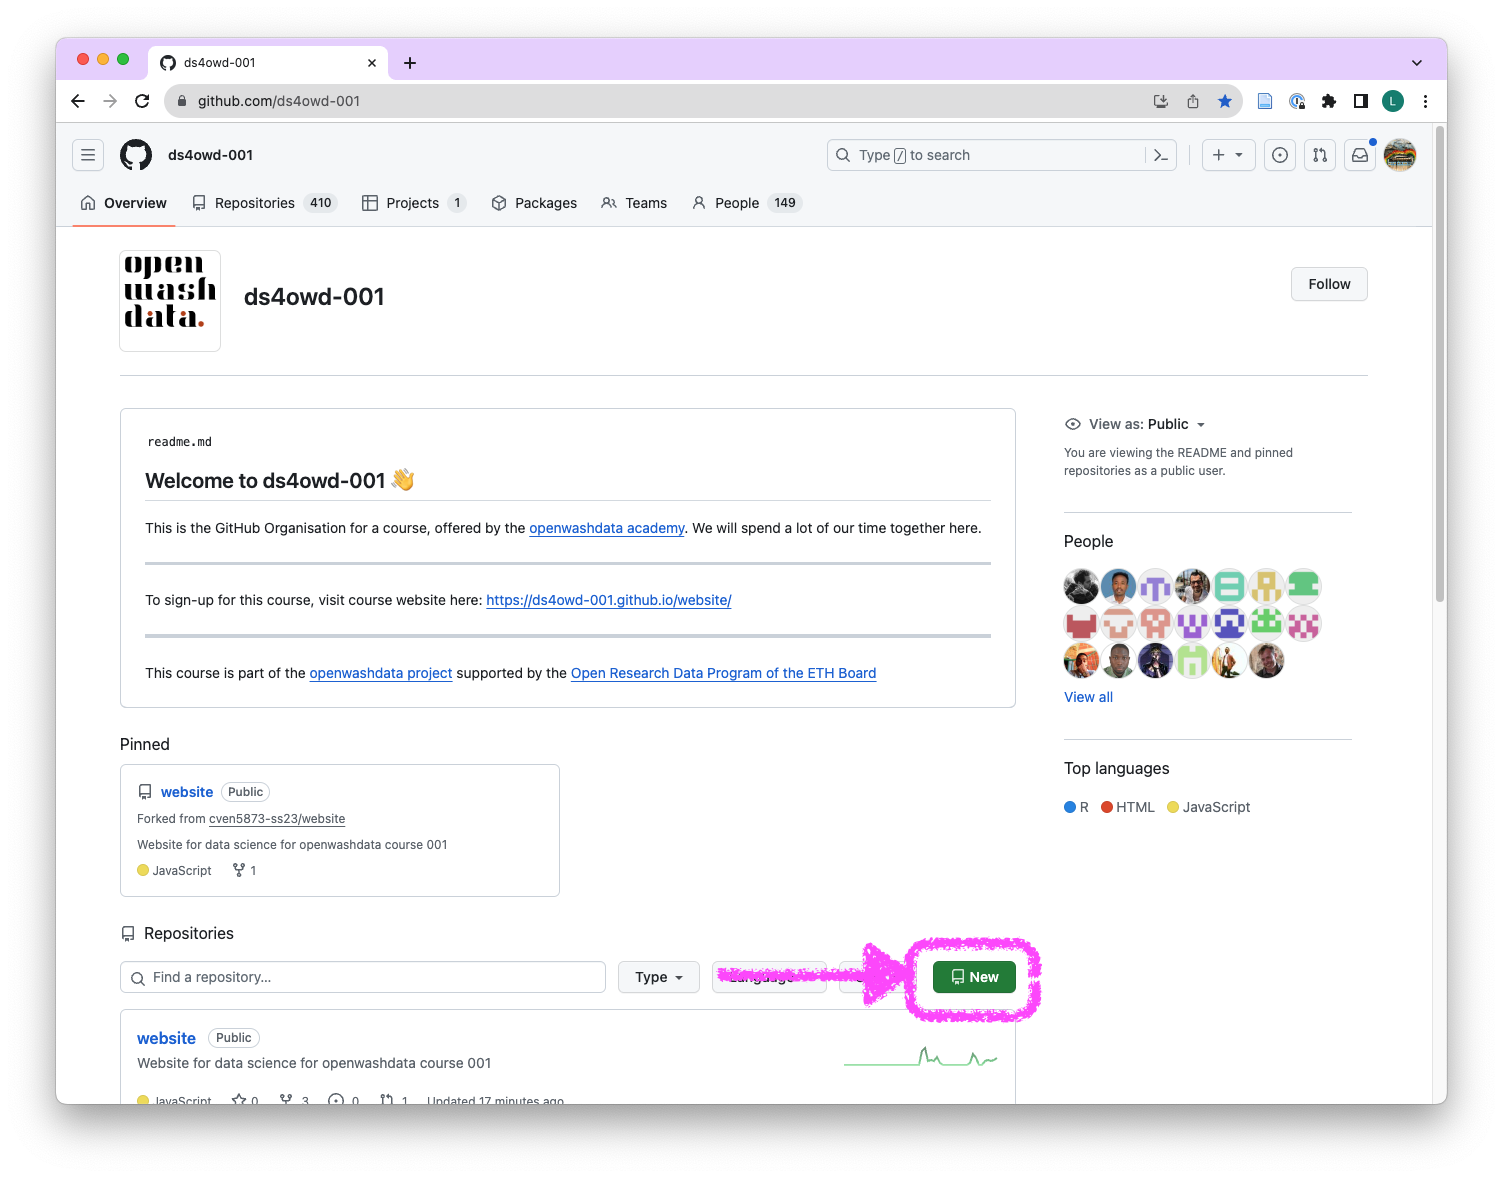
- Open the GitHub Organisation for the course https://github.com/ds4owd-001
- To right of the field “Find a repository”, click on the green “New” button.
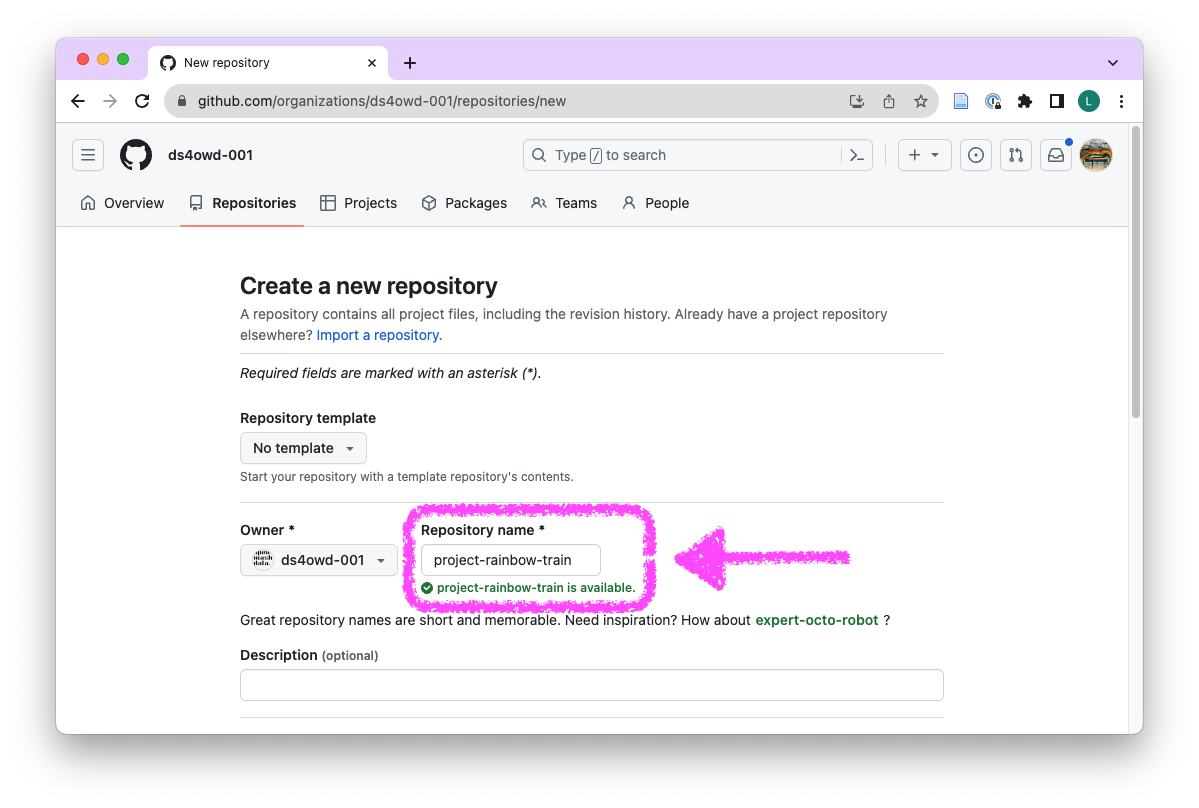
- In the “Repository name” field write
project-username. Replace username with your GitHub username. Avoid using spaces. For example:project-rainbow-trainfor the user with the usernamerainbow-train
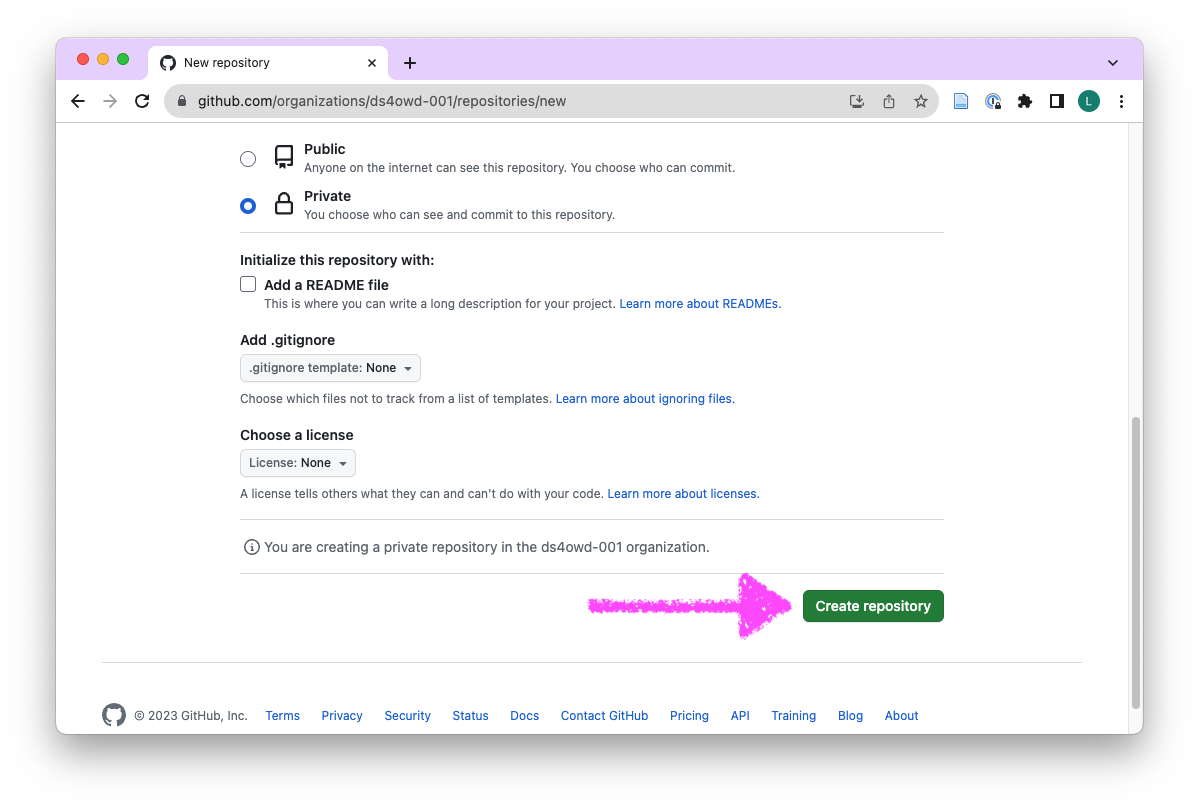
- Scroll down on the same page, and click “Create repository”.
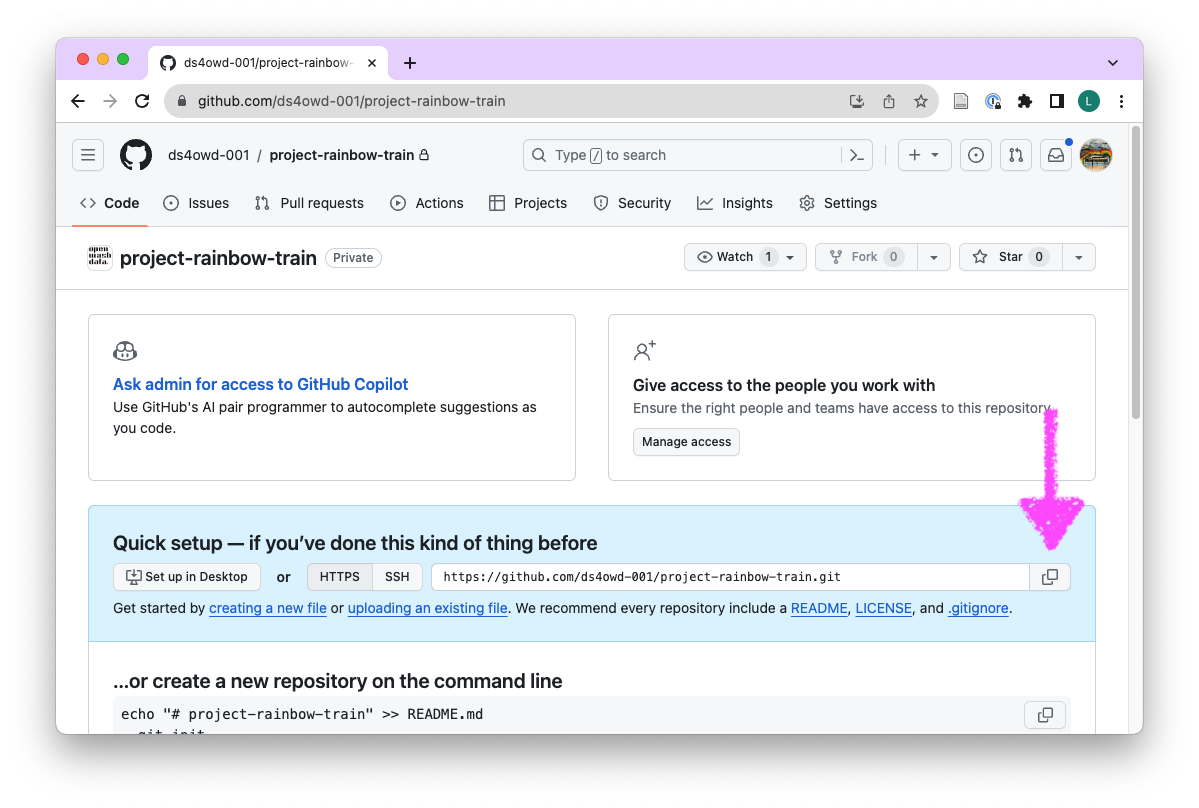
- In the “Quick setup” field, click on the clipboard next to the HTTPs URL
- Open the ds4owd workspace on posit.cloud
- Click New Project > New Project from Git Repository
- Paste the HTTPS URL from GitHub into the “URL of your Git Repository” field.
- Wait until the project is deployed.
Step 3: Create new folders
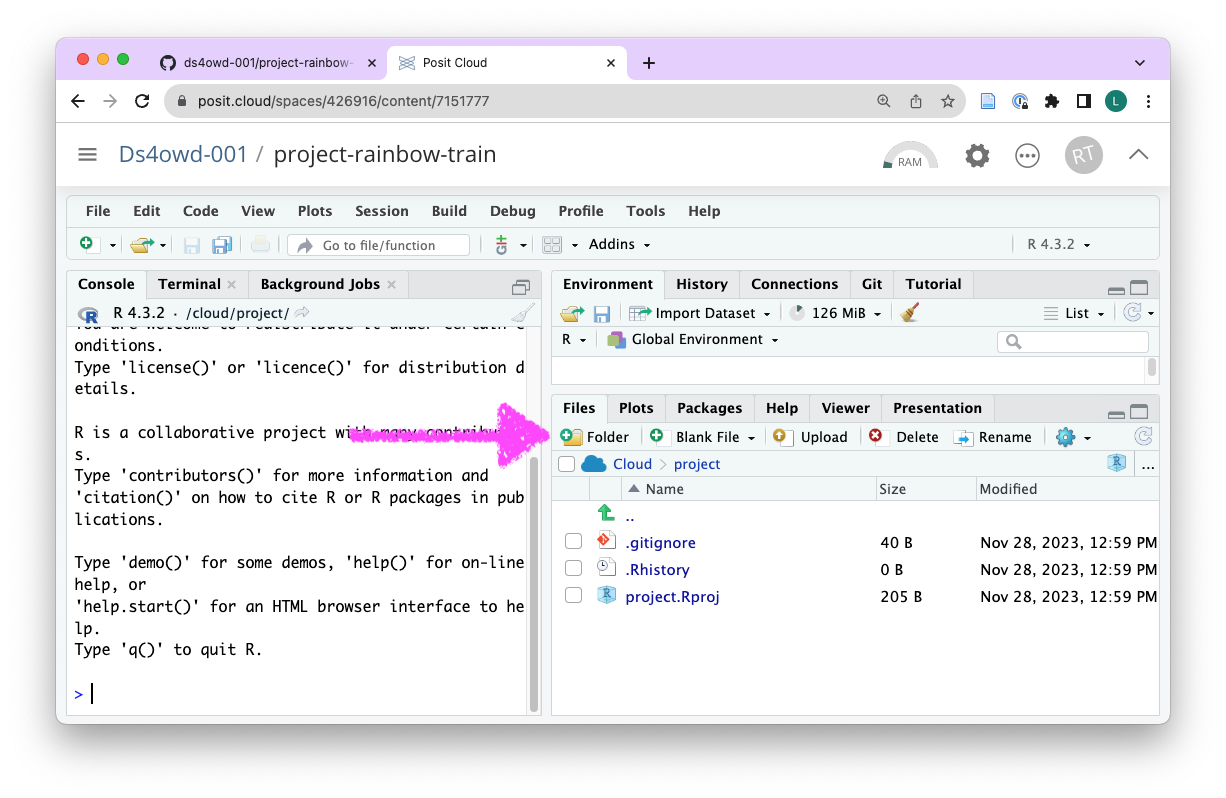
- Navigate to the Files tab in the bottom right window of RStudio.
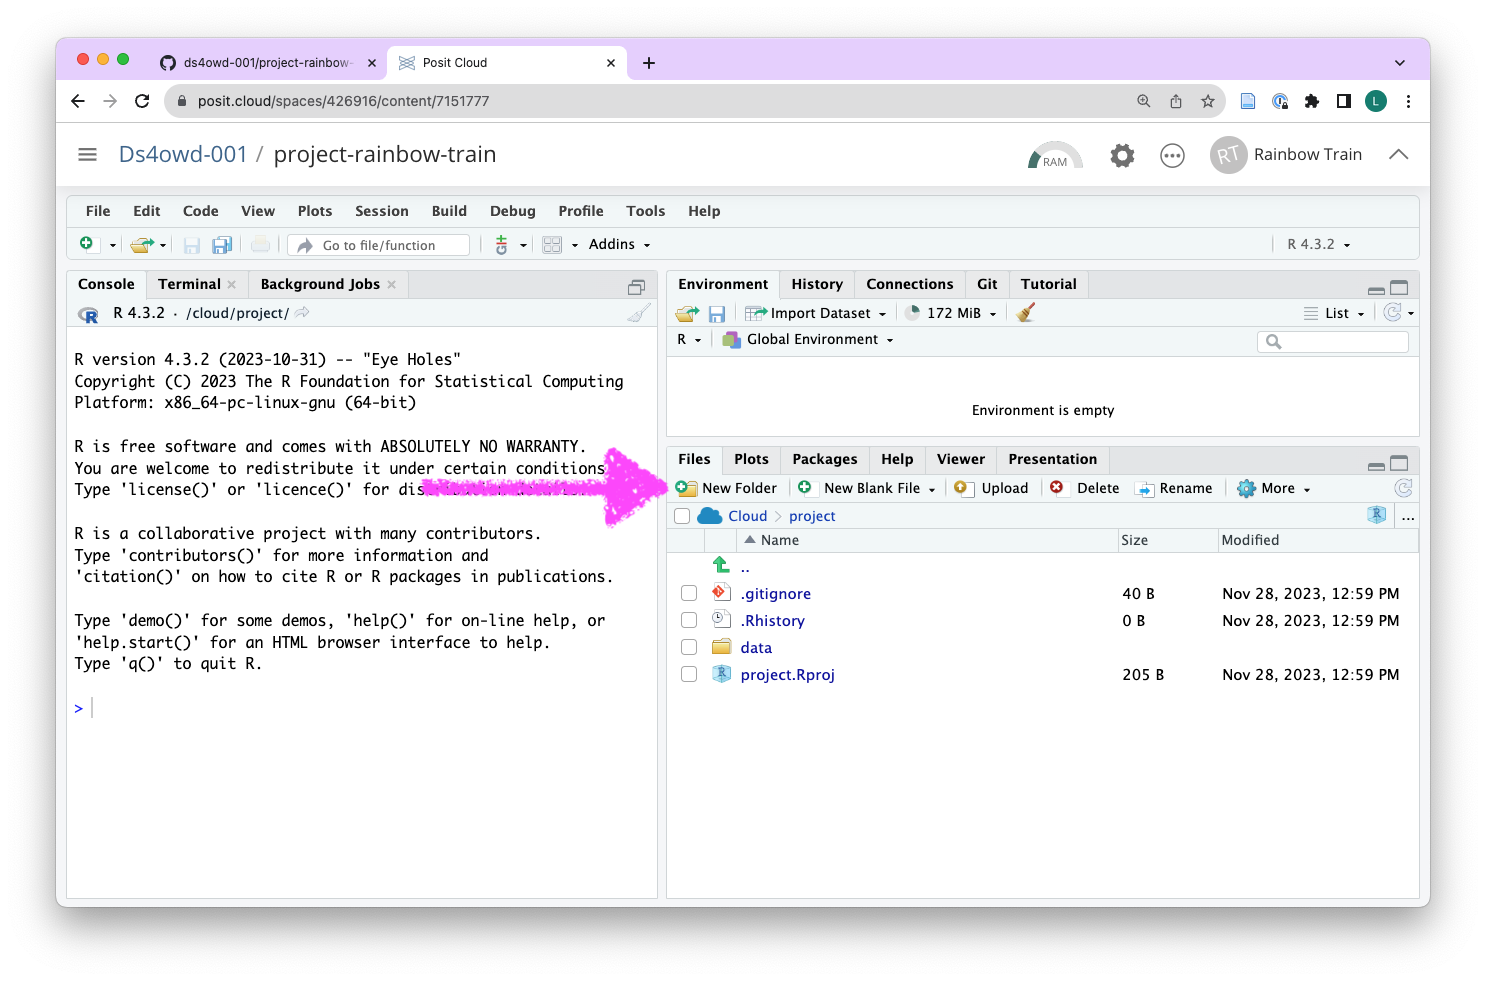
- Click on the “Folder” button.
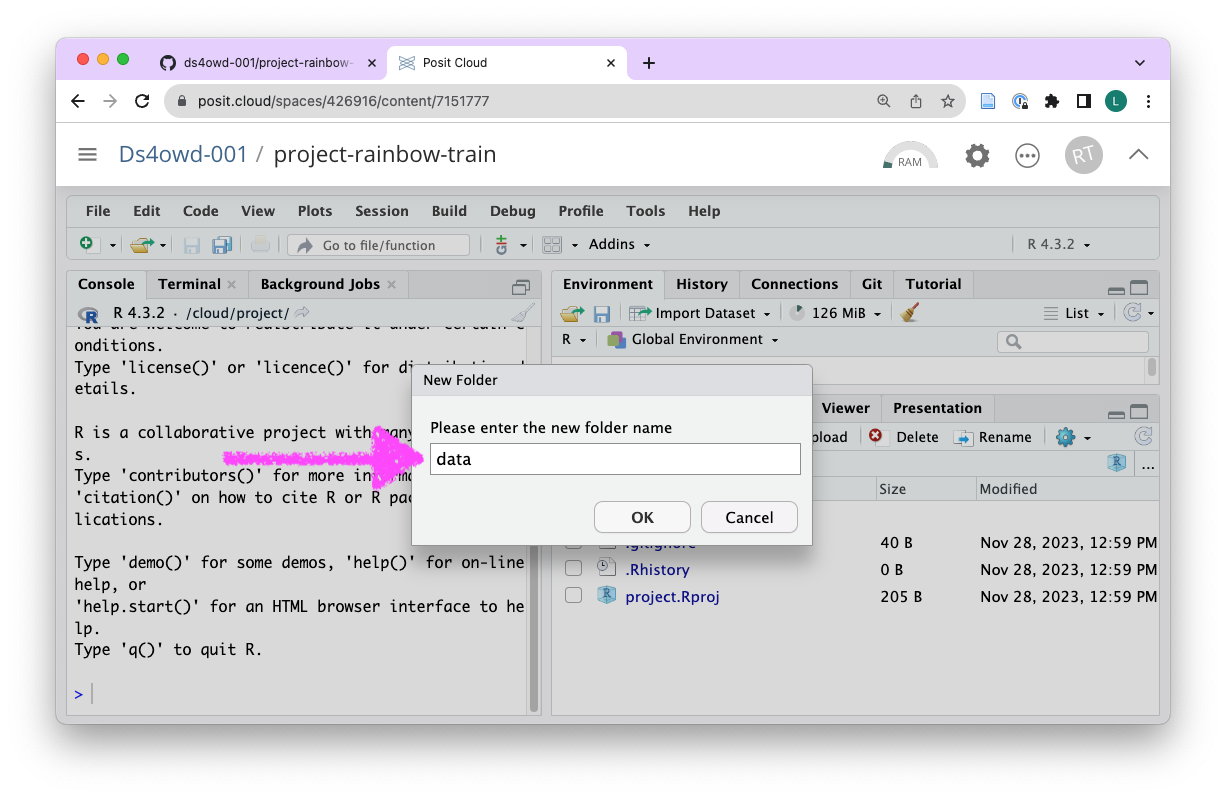
- Enter the name “data” in field and click OK.
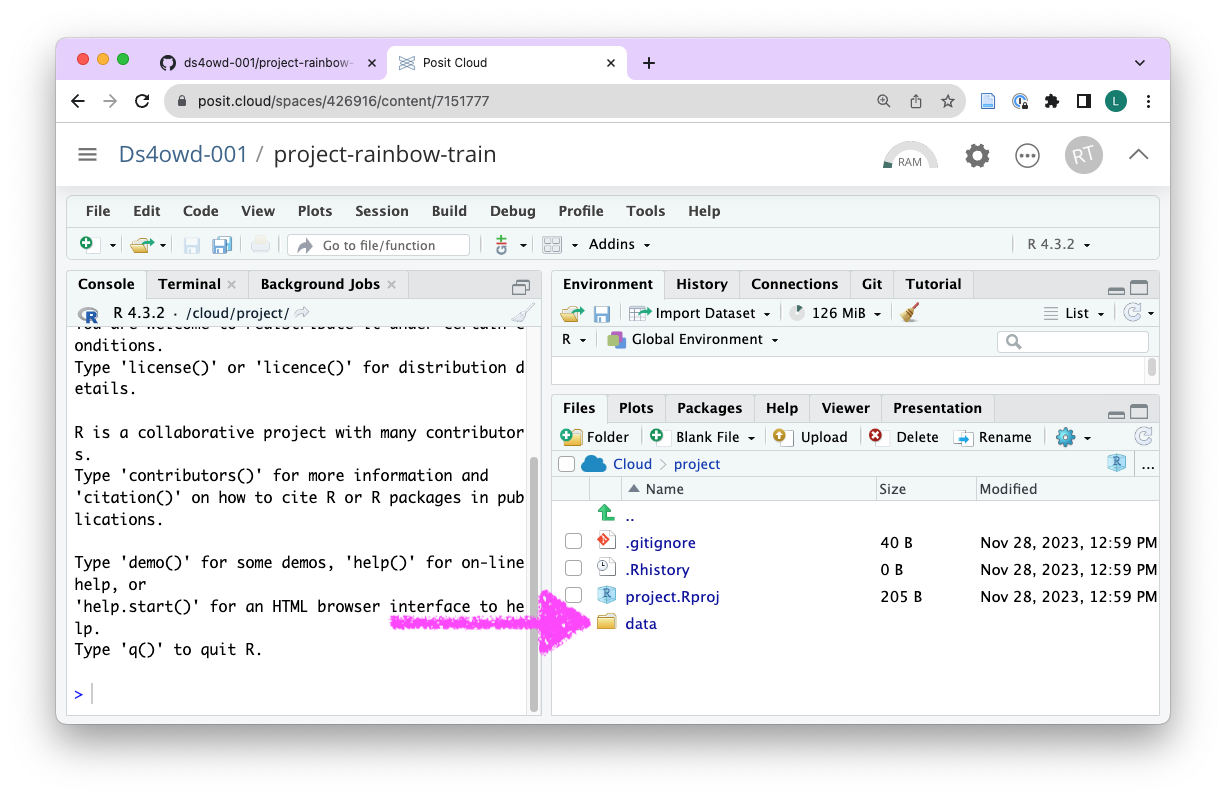
- Click on the new
datafolder in the bottom right window.
- Click on the “Folder” button.
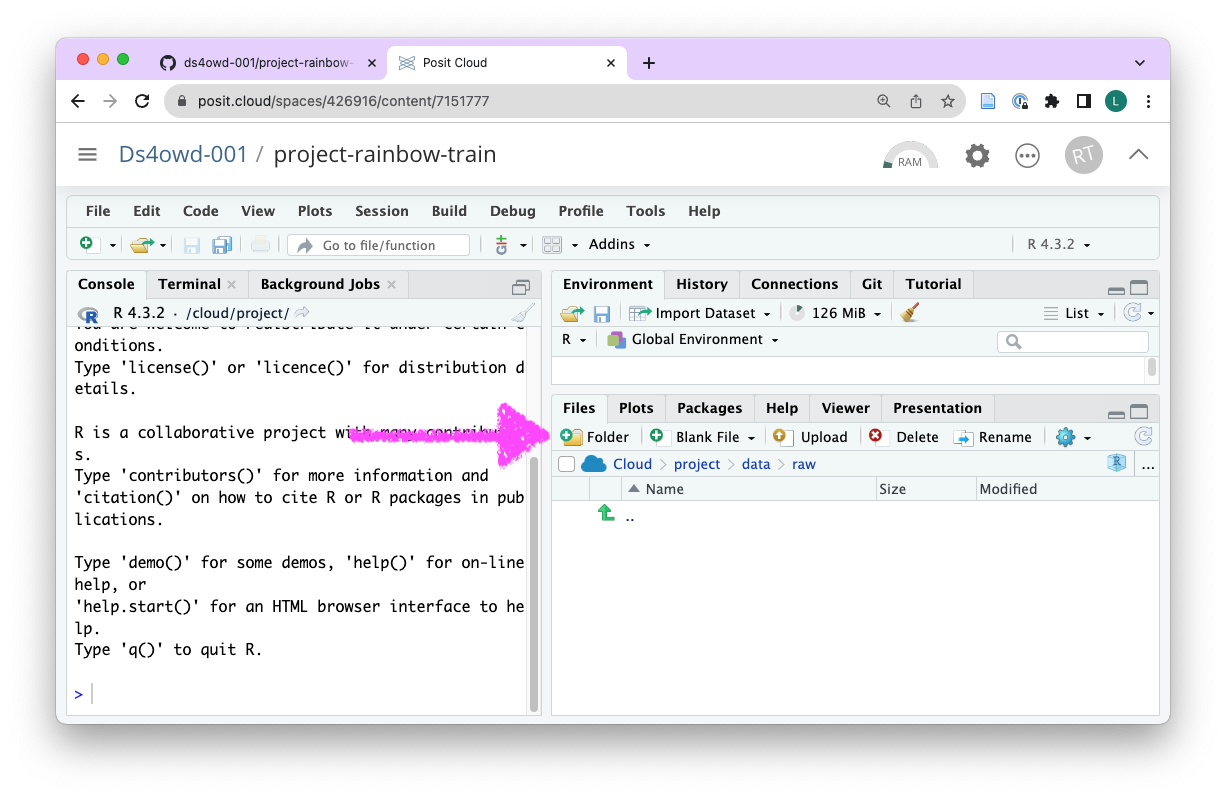
- Enter the name “raw” in field and click OK.
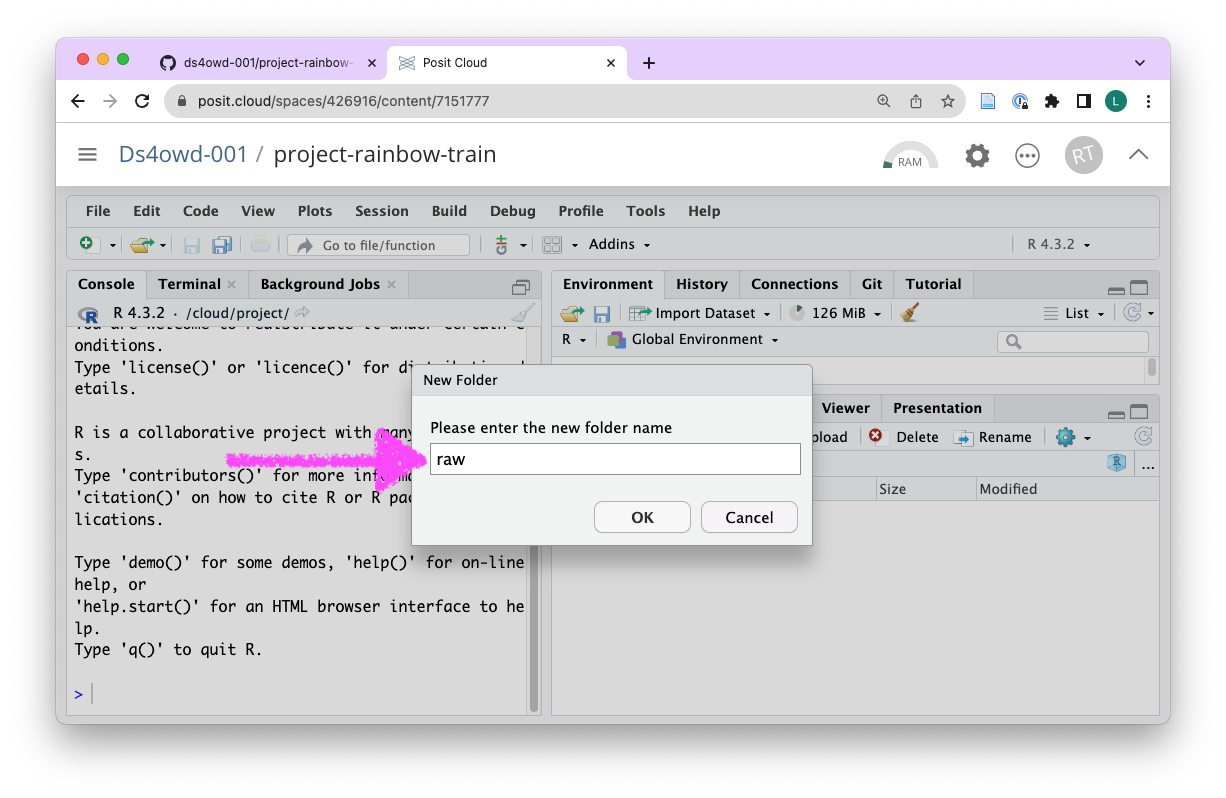
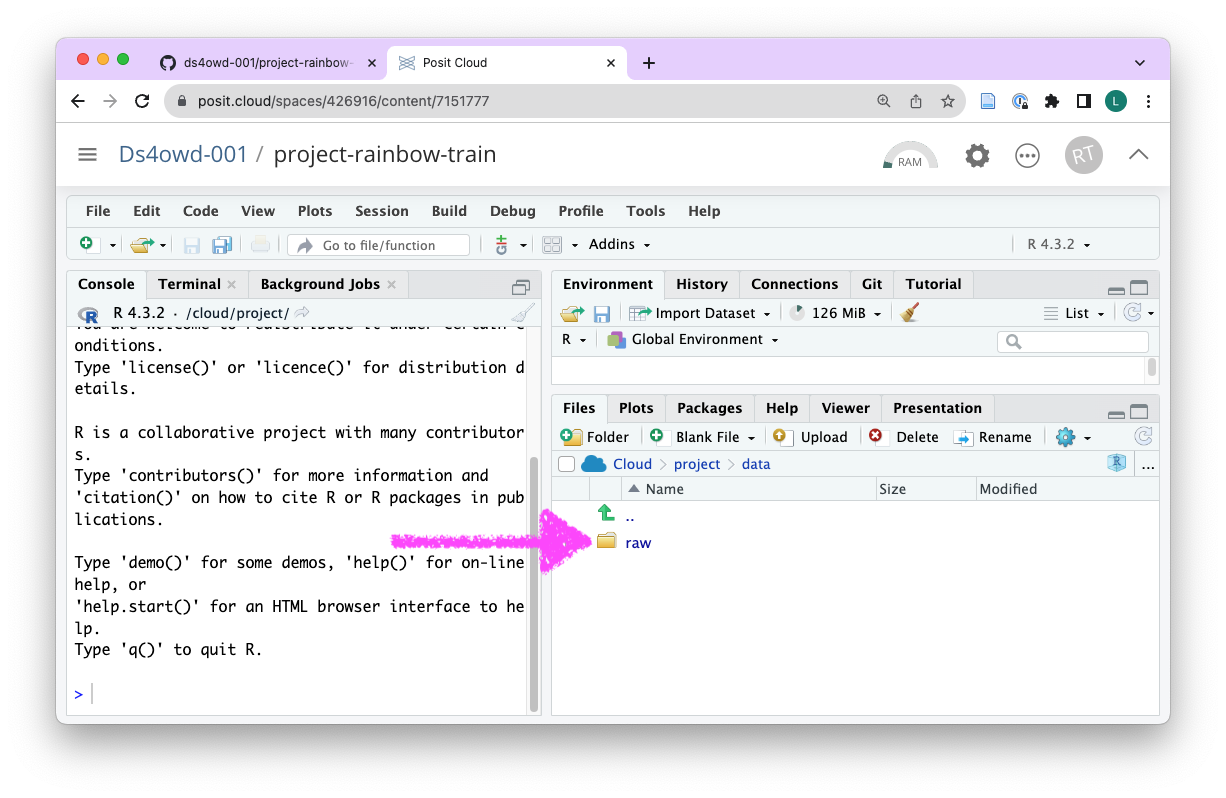
- Click on the new
rawfolder in the bottom right window.
Step 3: Upload the data
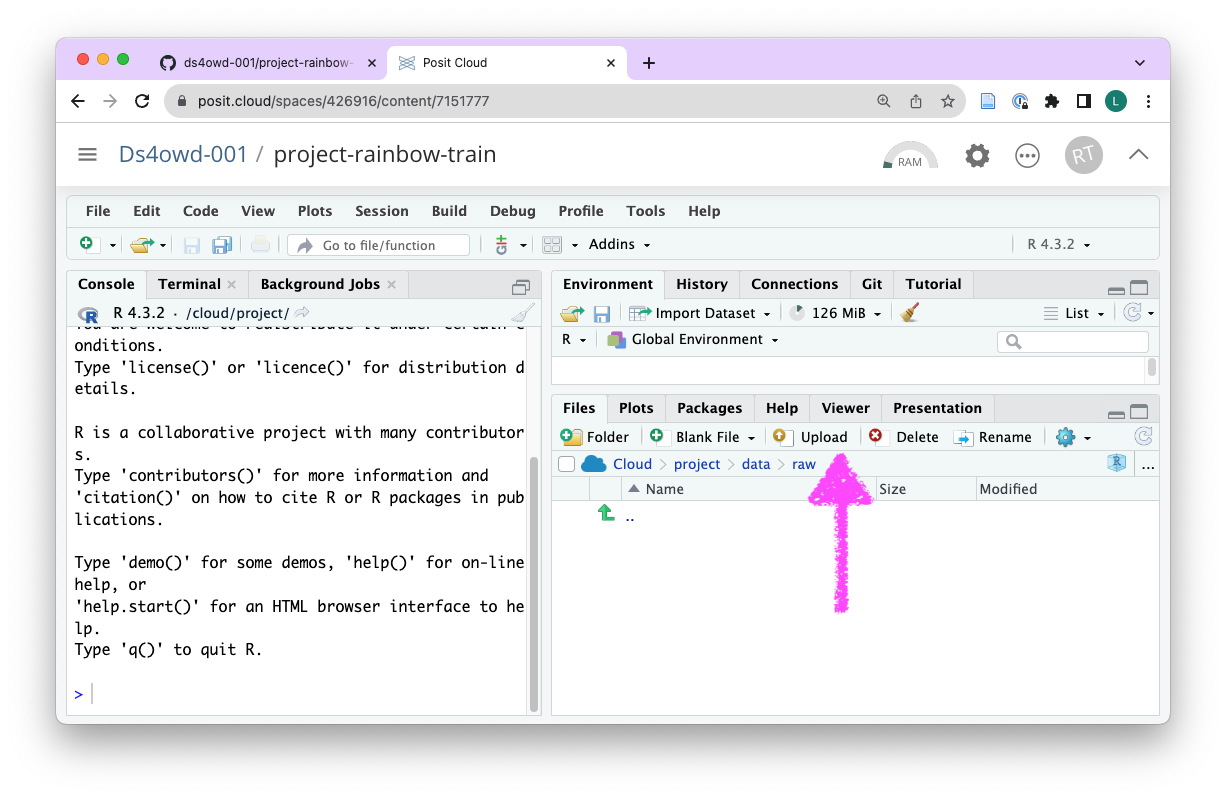
- Use the Files tab in the bottom right window to upload your identified data from Task 1 into the
rawfolder.
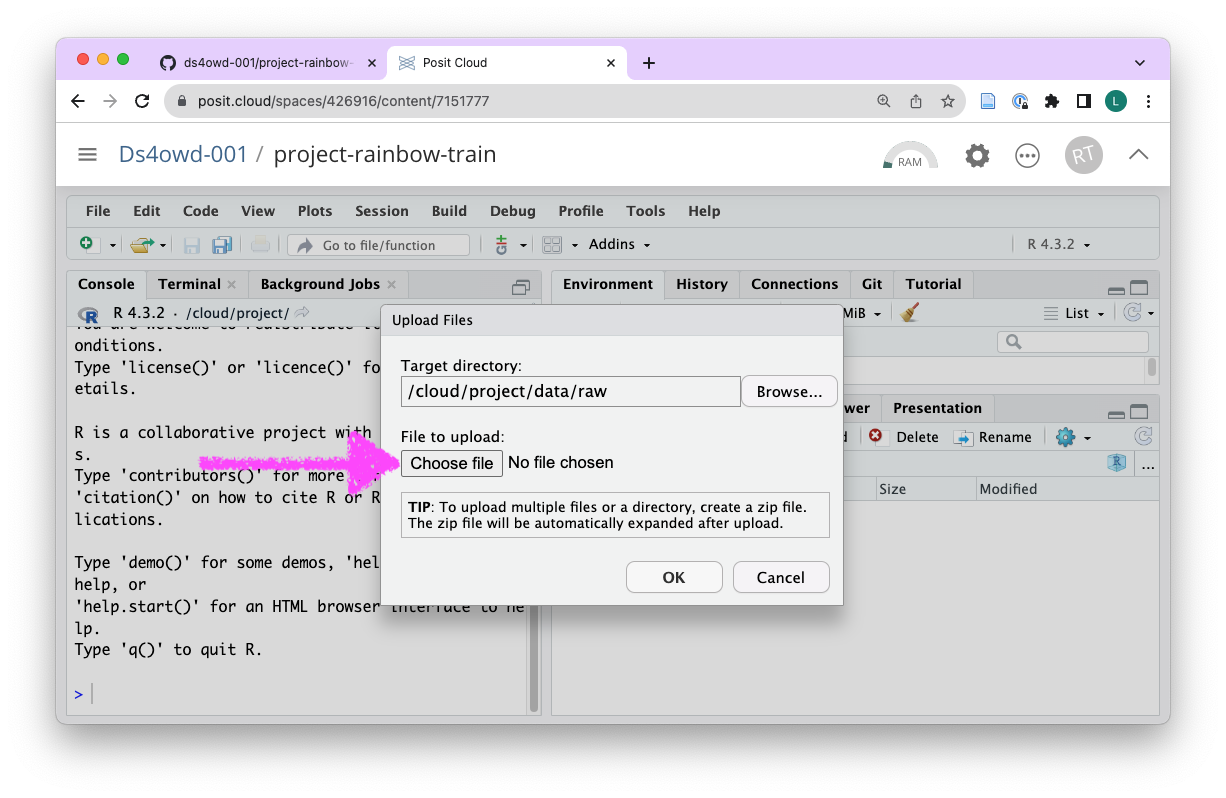
- Choose the file from the place you have saved it on your computer.
Step 4: Describe your data and goals
- Navigate back to the root of your project folder by a click on the blue R cube.
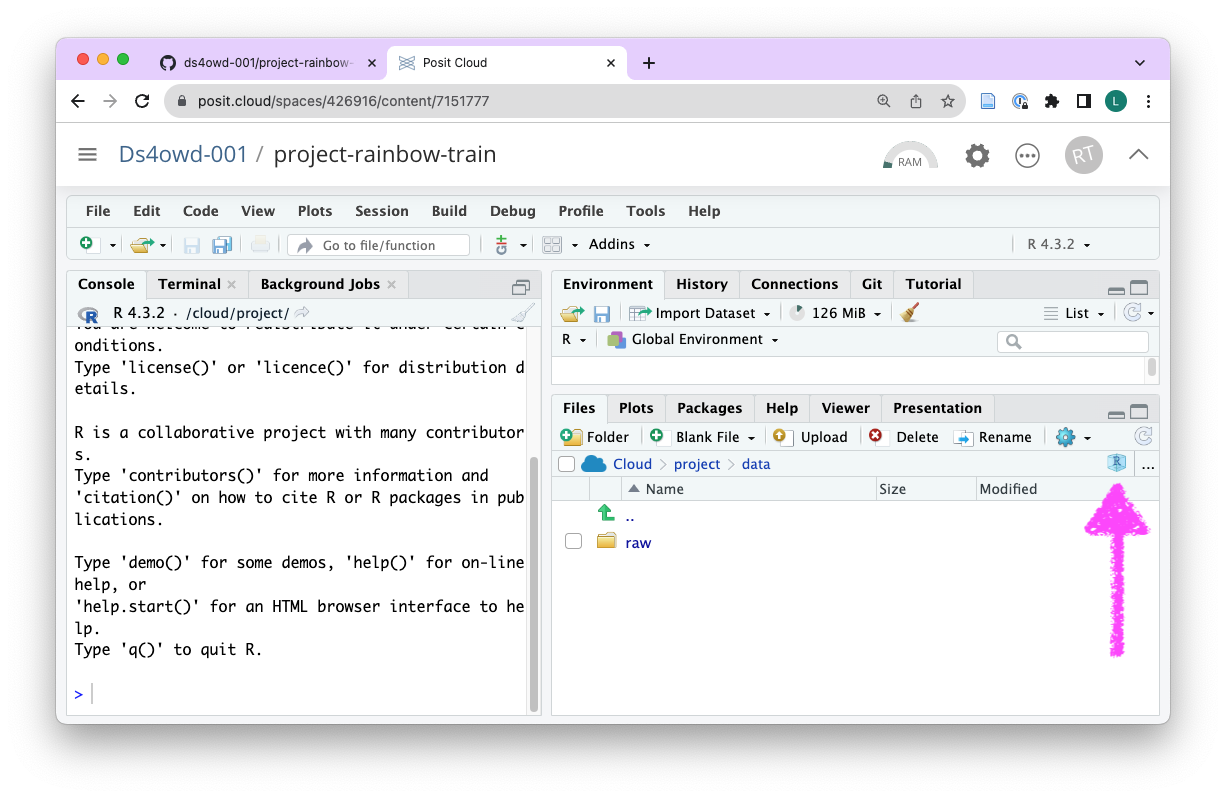
- Create a new folder “docs” in the root of your project folder.
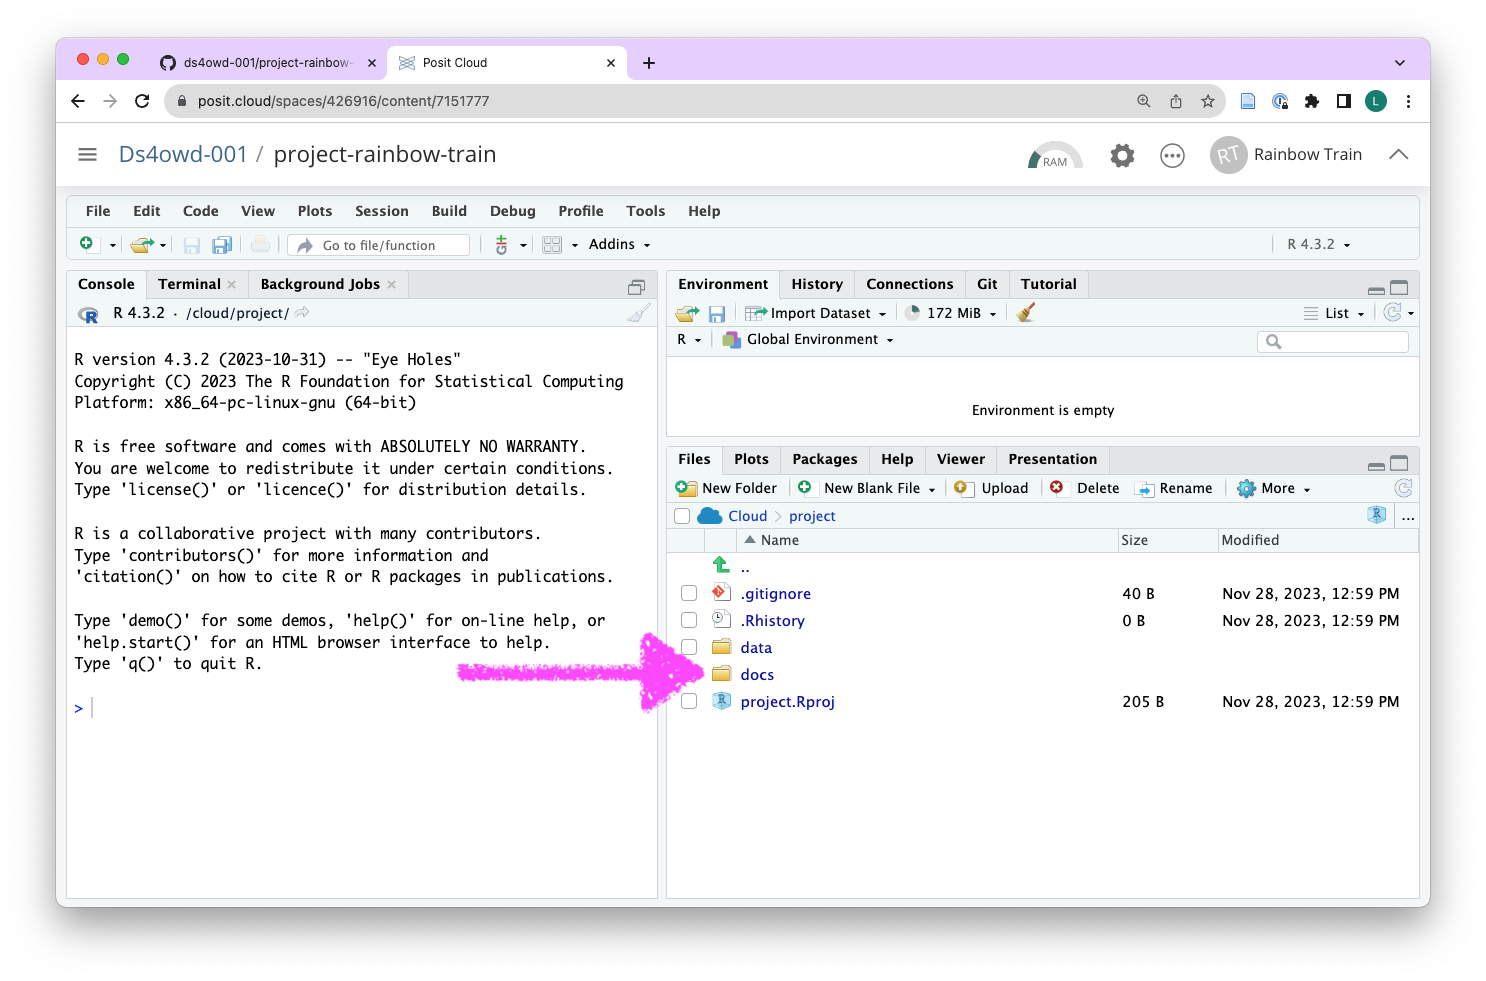
- Click on the
docsfolder
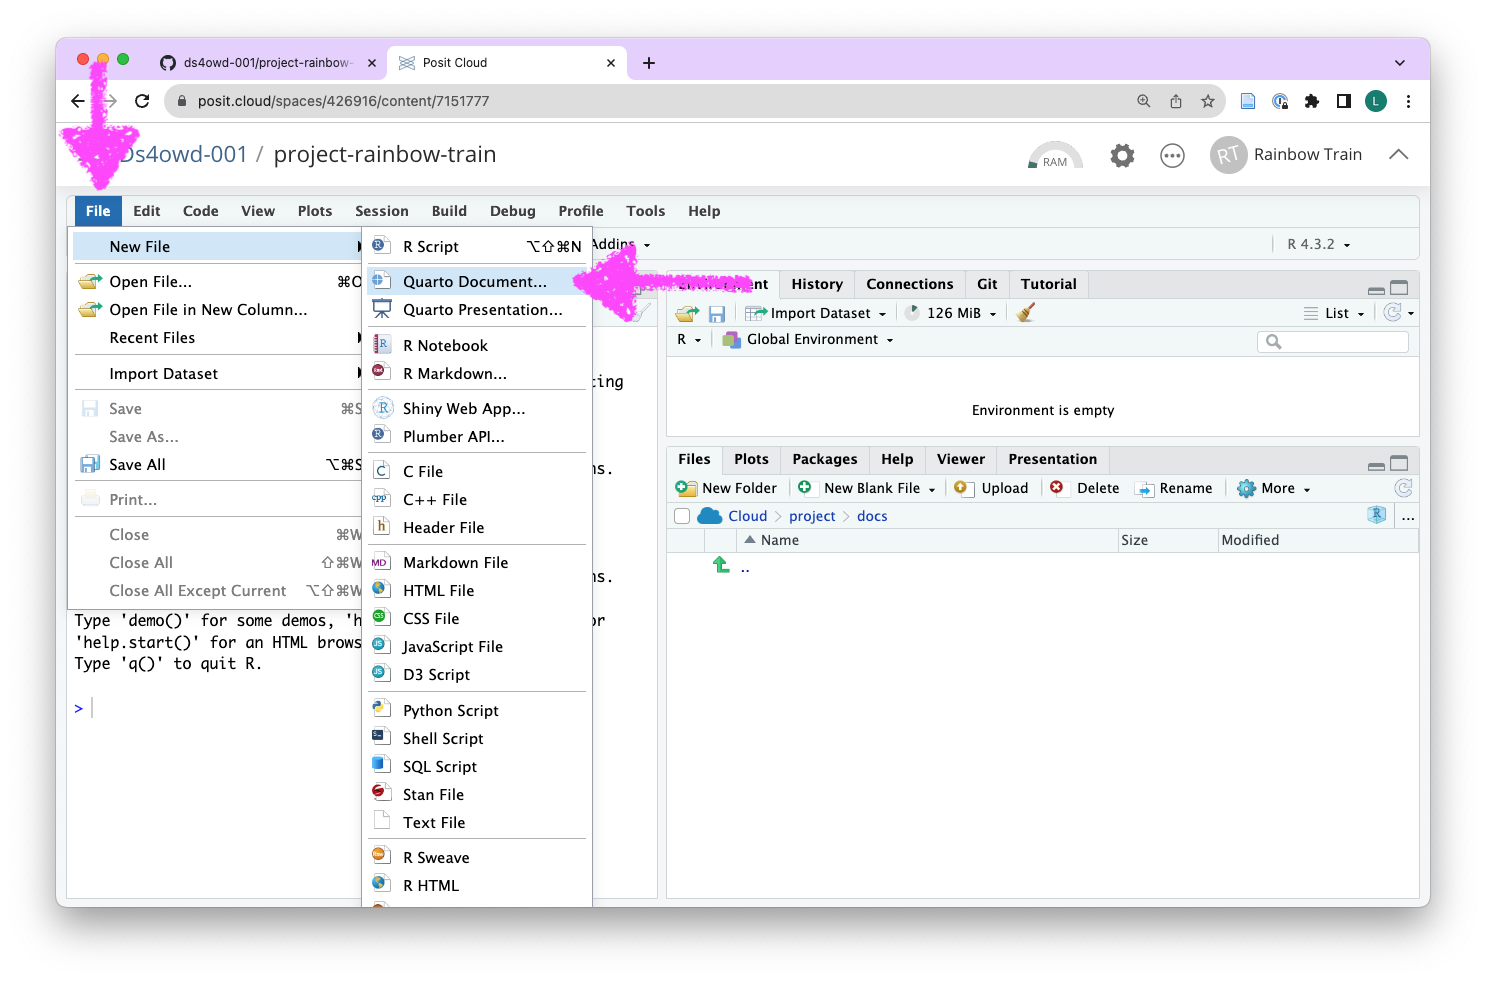
- Create a new Quarto document and save it as
index.qmdinside the docs folder.
- In the
index.qmdfile, write a short description of your analysis goals and the data you have uploaded.
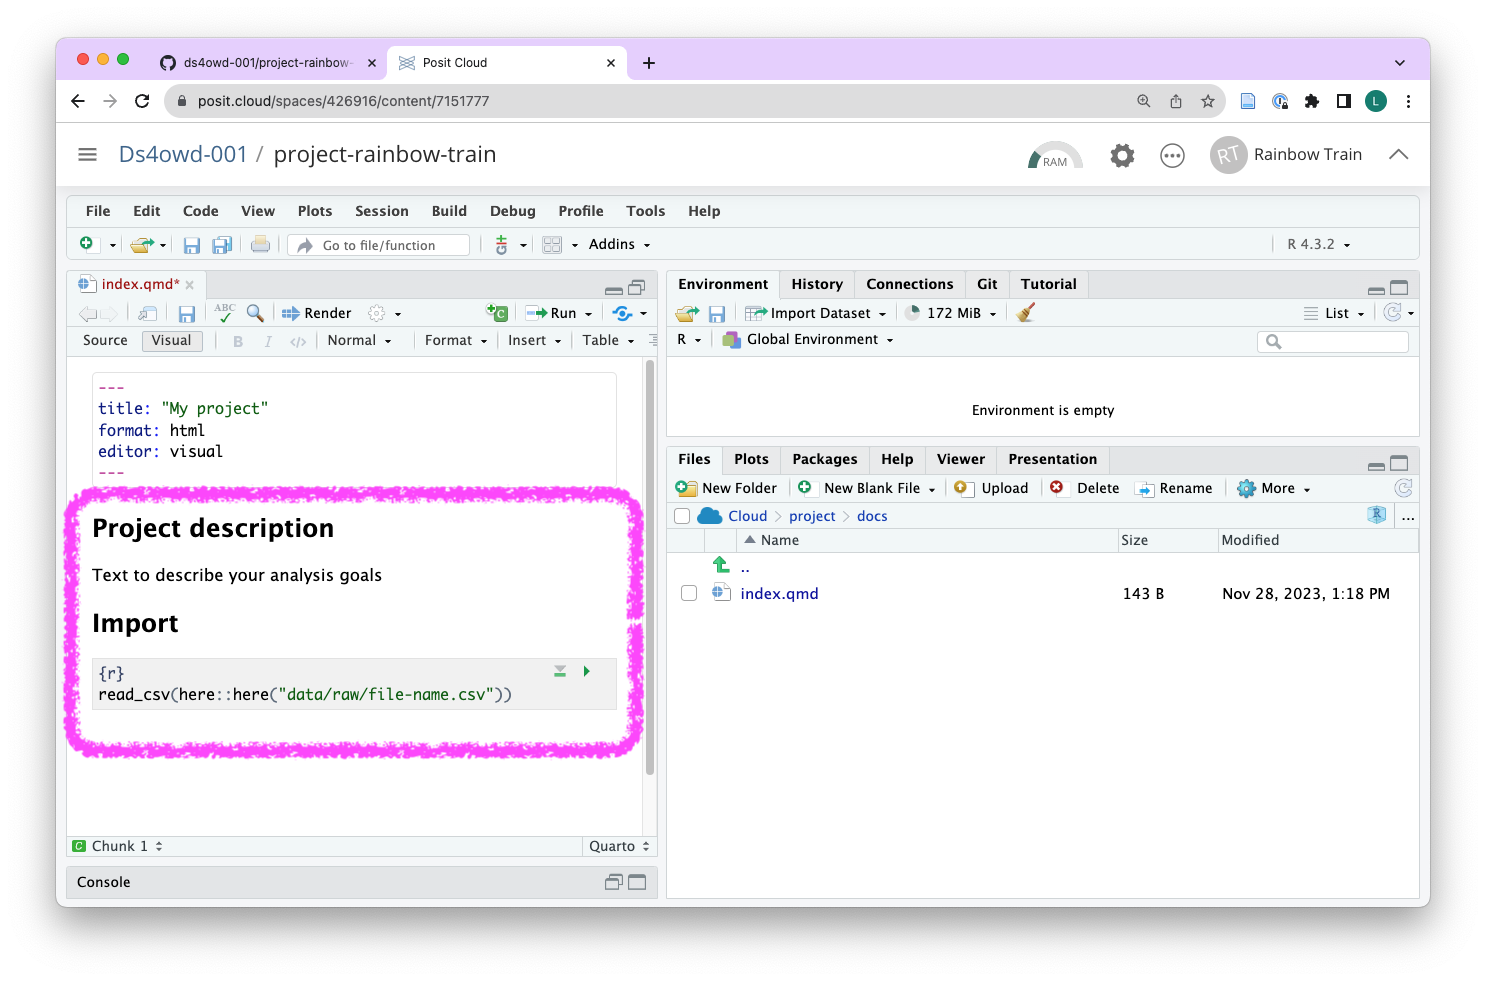
- Add a code chunk and write
library(tidyverse)to load the R packages you have learned to work with.
```{r}
library(tidyverse)
```- Import your data by writing the following inside another code chunk (in this example we are using a CSV file):
read_csv(here::here("data/raw/your-file-name.csv"))
The
here R package
We recommend using the here R package to refer to files in your project. The here R package helps with finding the correct file path to your data. We will discuss file paths and the package itself in another module.
Step 5: Commit and push your changes
- Navigate to the Git pane in the top-right window of RStudio
- Check the box next to all files to stage them for a commit
- Click on the “Commit” button
- Enter a commit message in the “Commit message” field
- Click on the “Commit” button
- Click on the “Push” button
- Enter your GitHub username and GitHub Personal Access Token (PAT) in the “Username” and “Password” fields
Do not use your GitHub password
You need to enter the GitHub Personal Access Token (PAT) you created in Step 1 to push your changes back to GitHub.
Step 6: Open an issue on GitHub
- Open github.com in your browser.
- Navigate to the GitHub organisation for the course.
- Find the repository project- that ends with your GitHub username.
- Click on the “Issues” tab.
- Click on the green “New issue” button.
- In the “Title” field write: “Identify project data and describe analysis goals.”.
- In the “Leave a comment” field, tag the course instructors @larnsce @mianzg @sskorik01
